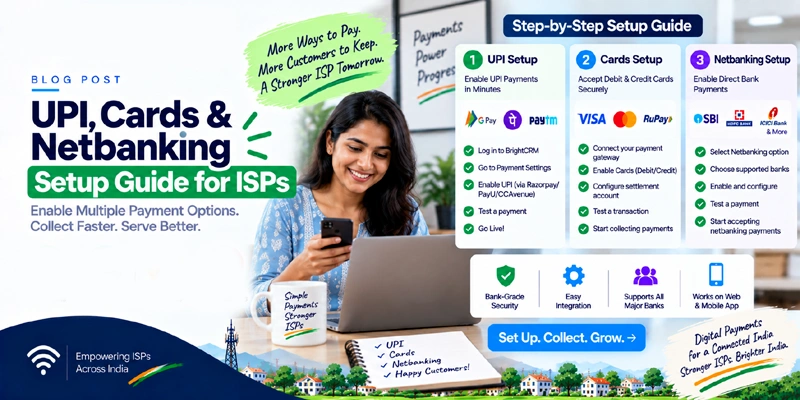
Why Cash-Only Collection Is Holding Your ISP Back
If your team is still driving door-to-door to collect cash, or waiting days for customers to walk into your office, you're losing time, risking cash-handling errors, and making it harder for customers to pay you the moment they think of it — which is often outside office hours.
Online collection through UPI, cards, and net banking removes all three problems: customers pay in seconds from their phone, money lands in your account without anyone touching cash, and payment happens whenever the customer is ready — not just when your collection agent shows up.
The Three Payment Rails You Need
- UPI (Unified Payments Interface): The fastest-growing payment method in India. Customers pay via Google Pay, PhonePe, Paytm, or any UPI app by scanning a QR code or clicking a payment link.
- Cards: Debit and credit card payments through a secure checkout page, useful for customers who prefer card-based billing or don't use UPI.
- Net Banking: Direct payment from a customer's bank account, still preferred by some older or more conservative customers.
You don't need to build separate systems for each — a single payment aggregator (also called a payment gateway) handles all three through one integration.
Step 1: Choose a Payment Aggregator
A payment aggregator sits between your billing software and the banking network, handling UPI, cards, and net banking through one connection. Commonly used providers in India include Razorpay, PayU, Cashfree, PhonePe for Business, and CCAvenue. When comparing options, look at:
- Transaction fees (TDR — Transaction Discount Rate) across UPI, cards, and net banking separately, since UPI is typically cheapest
- Settlement speed — how quickly money reaches your bank account (T+1 or instant settlement options)
- Whether they support recurring/subscription billing (important for monthly broadband plans)
- Ease of integration with your existing billing software
💡 Note on Fees
Fees and settlement terms change often and vary by provider and business category, so always confirm current rates directly with the aggregator before signing up. This guide explains the general process, not a specific pricing commitment.
Step 2: Gather Your KYC Documents
For most small businesses (including sole proprietorship ISPs), the standard document set is:
- Identity proof: PAN card
- Address proof: Aadhaar, passport, voter ID, or driving license
- Bank proof: A cancelled cheque or passbook page showing your name, account number, and IFSC code
- Business proof: GST certificate (if registered), a recent utility bill, rent agreement, or Udyam/MSME registration
- Photograph: A recent passport-sized photo
Good news for smaller or newer ISPs: GST registration is generally not mandatory for payment gateway onboarding, though having it can simplify verification and is useful for invoicing regardless.
Step 3: Complete Registration & Verification
The typical onboarding process looks like this:
- Fill out the online application with your business details
- Upload clear scans of the documents above
- The provider runs verification checks — KYC authenticity, PAN verification, bank account verification, and risk screening
- Review and digitally sign the merchant agreement
- Integrate the payment gateway (via API, a hosted payment page, or QR codes)
- Run a few test transactions before going fully live
Most providers activate accounts within 1–3 business days when documents are submitted correctly — though incomplete or unusual cases can take longer.
Step 4: Set Up Recurring Payments for Monthly Bills
Broadband billing is inherently recurring — the same customer pays roughly the same amount every month. Two options handle this automatically instead of requiring a fresh payment link each time:
UPI AutoPay
A customer sets up a mandate once (usually authorized with a token payment of ₹1, which is auto-refunded), and future bills are debited automatically on the scheduled date without repeated approval. It works well for smaller, predictable ticket sizes — which describes most broadband plans (typically ₹500–₹2,000/month).
e-NACH
A bank-based mandate system that takes 1–5 working days to set up through bank authentication. It supports higher transaction limits and suits enterprise or bulk-plan customers better than everyday retail broadband billing.
📊 Which One for a Broadband ISP?
For typical monthly plans in the ₹500–₹2,000 range, UPI AutoPay is generally the lower-cost, faster-to-set-up option. Larger ISPs with enterprise or bulk-bandwidth customers on higher-value invoices may find e-NACH better suited for those specific accounts.
Step 5: Connect It to Your Billing Software
A payment gateway alone only collects money — it doesn't know which customer's bill just got paid, update their plan validity, or tell your RADIUS server to reactivate their internet. That connection has to happen through your billing software.
With BrightCRM, once your payment gateway is connected:
- Every payment is automatically matched to the correct customer account — no manual reconciliation
- A digital receipt is generated and sent instantly via SMS/WhatsApp
- The customer's internet is reactivated automatically through your RADIUS integration
- Failed or bounced recurring payments trigger an automatic reminder instead of silent suspension
Step 6: Test Before You Go Live
Before rolling this out to your full subscriber base, run it with a small group of customers for one billing cycle. Check that payments reconcile correctly, receipts go out promptly, and internet reactivation actually fires — then expand to everyone once you've confirmed it works end to end.
What to Expect on Settlement
Once a payment is collected, funds typically settle into your business bank account within a schedule your provider defines — commonly next business day (T+1), with some providers offering faster or instant settlement at a slightly higher fee. Always confirm your specific provider's settlement schedule and any minimum balance or reserve requirements before committing.
Common Mistakes ISPs Make During Setup
- Skipping the test phase: Going live with all subscribers before confirming reconciliation works correctly
- Ignoring recurring payment options: Sending a fresh payment link every month instead of setting up AutoPay, which increases missed payments
- Not connecting payments to RADIUS: Collecting money online but still manually activating/suspending internet, which defeats much of the time-saving benefit
- Choosing based on TDR alone: The lowest headline fee isn't always the lowest total cost once settlement charges, retries, and AMC are factored in
Real-World Impact
Broadband ISP, Lucknow
"Switching from cash collection to UPI cut our collection time from a week to under two days for most customers."
Cable Operator, Indore
"UPI AutoPay meant customers stopped forgetting to pay. Our on-time collection rate went up noticeably in the first two months."
Conclusion: Start with UPI, Add the Rest as You Grow
If you're setting up online collections for the first time, start with UPI — it's the cheapest, fastest to set up, and the payment method most of your customers already use daily. Add cards and net banking as secondary options for customers who prefer them, and set up UPI AutoPay as soon as you can to stop chasing the same customers every single month.
This guide covers the general process for informational purposes. Fees, documentation requirements, and settlement terms vary by provider and can change — confirm current details directly with your chosen payment aggregator before signing up.
Want Payments and Internet Activation Connected Automatically?
See how BrightCRM ties your UPI, card, and net banking collections directly to automatic activation and suspension.
Schedule Free Demo